Disclaimer
Description
Ever feel like your website’s journey is stuck in first gear? Like, you have all these awesome destinations (content!), but your users are wandering aimlessly, scratching their heads, and muttering about getting a refund on their metaphorical bus ticket? Well, buckle up buttercup, because Advancement Map: Routes is here to slap a GPS on your site and turn that aimless wander into a scenic road trip.
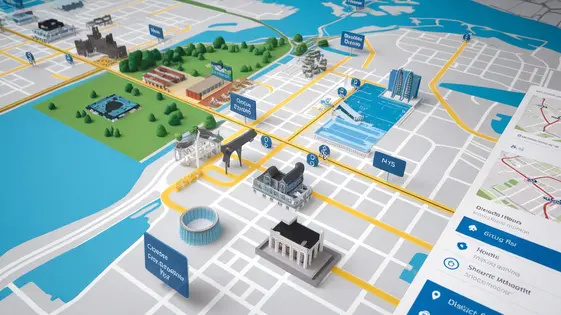
Advancement Map: Routes isn’t just another plugin; it’s your friendly neighborhood pathfinder, meticulously crafted as a fork of Progress Map, Directions, designed to guide your users through your content with the grace of a caffeinated Sherpa. Forget those boring, linear navigation systems of yesteryear. We’re talking dynamic, interactive maps that visually showcase the route to enlightenment (or, you know, just completing a course or exploring your product catalog).
Think of it as less of a plugin, and more of a digital breadcrumb trail, only instead of leading to a gingerbread house (hopefully), it leads to increased engagement, higher completion rates, and a user experience so smooth, it’ll make butter jealous. This is the tool to ensure your visitors arrive exactly where they need to be, fully informed, and ready to throw money at your face. So, ditch the disorientation and embrace the directional dominance of Advancement Map: Routes. It’s time to put your website on the map, literally.
Plotting Your Course: Setting Up Advancement Map: Routes
Alright, you’ve bravely installed the Advancement Map: Routes. Now comes the slightly less thrilling part: configuration. But hey, at least it’s not debugging! First, hunt down the plugin settings. Yes, it’s probably hiding where you least expect it. Once found, behold the glory of options!
Next, create a new map. Give it a witty name; something that screams, “I’m a sophisticated developer!” Now for the fun part: markers. Add them like you’re sprinkling fairy dust. Each marker represents a crucial… something. Then, the grand finale: connecting the dots (literally!). Draw lines between your markers to create routes. Marvel at your digital masterpiece.
Feeling fancy? Customize the map’s appearance. Change colors, line styles, and more. For instance, this snippet can make your route lines a dashing shade of purple:
route_line_color: '#800080'
Remember to respect the original author, Hicham Radi (CodeSpacing), while bending this plugin to your will. Don’t go blaming them when your purple route lines clash horribly with your orange markers. Onward to marker mayhem!
Marker Mayhem: Customizing Your Destinations
So, you’ve slapped some markers on your map. Congratulations. But are they just… basic? Let’s elevate those digital pins beyond the mundane.
First, custom icons. Ditch the default blob. Upload your own! SVG? PNG? Go wild! Just don’t blame me when your server implodes under the weight of a 4K icon collection. You’ll find this option in the marker edit panel. It’s usually where you’d expect it.
Labels, those oh-so-helpful text snippets. Sure, you could leave them as ‘Marker 1,’ ‘Marker 2,’ but why be boring? Inject some personality. Use this space to give the user a hint of what to expect.
Then, the descriptions. Oh, the glorious descriptions! HTML is your friend. Embed images, videos, or even a rambling essay about your cat’s favorite napping spots – if that’s your thing. Keep it concise, or write a novel; your call. Don’t get too creative or I might not understand it.
Remember, these aren’t just markers; they are experiences. Or, well, they could be, if you put in some effort. Now, off you go; time to unleash your inner cartographic artist… or not. Whatever.
Route Revelation: Connecting the Dots with Style
So, you’ve bravely charted your course and plotted your destinations. Now, let’s ditch the dull and crank up the visual excitement! You’re no longer satisfied with a simple line between A and B. Good. Basic is boring.
Let’s talk route customization. Color is your canvas! Dive into the settings and choose hues that scream ‘adventure’ or subtly whisper ‘intrigue’. Not feeling solid lines? Dotted, dashed, or a mysterious combination awaits your artistic touch. Thickness matters too. A barely-there wisp for delicate journeys, or a bold stroke to mark a path of epic proportions.
But wait, there’s more! It’s animation time. Breathe life into your routes. Imagine a shimmering effect that traces the path, or perhaps a subtle pulse that guides the eye. Think beyond static lines; consider dynamic elements that draw viewers in. Explore options for adding moving icons along the route – miniature ships sailing across the map or perhaps tiny cars speeding towards their destination. Keep it subtle, or go all out – just ensure it enhances, not distracts. Remember, a visually striking route is a memorable one. Now, go forth and make those lines sing!
Shortcode Shenanigans: Embedding Your Map Anywhere
Already familiar with shortcodes? Great! Embedding your meticulously crafted map is straightforward. Simply use the [adv_map] shortcode. Place it within any page or post to display your map. However, the magic truly begins with customization.
Fine-tune your map’s appearance using shortcode attributes. Control the initial zoom level with zoom="10" (adjust the number to your preference). Define a specific starting point by setting latitude and longitude: lat="34.0522" long="-118.2437". Want to alter the map’s height? The height attribute is your friend (e.g., height="500px").
Customize which routes are displayed using the route_ids attribute. Specify a comma-separated list (e.g., route_ids="1,2,3") to show only certain routes. Leaving this blank shows all routes. You can even disable clustering with clustering="false" if your map only has a few markers. Explore other attributes like scrollwheel to disable map zooming via scrollwheel. Experiment to find the perfect settings!
Troubleshooting Tribulations: Taming Common Issues
Even with the best map plotting tool, sometimes things go a little haywire. Let’s troubleshoot some common route-related headaches. First, ensure your API keys are correctly entered and haven’t expired. An invalid key is the most common culprit when maps refuse to appear or routes play hide-and-seek. Double-check those credentials!
Next, are your markers missing in action? Verify that the geocoding process worked correctly for each location. A typo in the address can send the geocoder on a wild goose chase. If your routes are behaving strangely, like taking bizarre detours, examine your route calculation settings. Maybe you’ve accidentally enabled “avoid highways” or “prefer ferries” when you’re nowhere near a ferry.
Finally, remember that conflicting script errors can sometimes mess with map functionality. If you’ve installed a new plugin or updated your theme, and suddenly your map acts up, try temporarily disabling other plugins to isolate the conflict. Often it is a battle between script calls that needs to be resolved. It is advised that you respect the original Progress Map, Directions and Hicham Radi (CodeSpacing). Happy mapping!
Final words
So, there you have it, folks! Advancement Map: Routes, the plugin that turns your website into a choose-your-own-adventure novel (minus the scary parts… hopefully). No more lost users, no more aimless clicking, just pure, unadulterated navigational bliss.
With its easy-to-use interface, customizable markers, and snazzy route options, Advancement Map: Routes is the perfect tool for guiding your visitors through your content and ensuring they arrive at their destination with a smile (and maybe a credit card in hand). Whether you’re building an online course, showcasing a product catalog, or simply want to add some visual flair to your site, this plugin has you covered.
But remember, with great power comes great responsibility. Use Advancement Map: Routes wisely, and don’t lead your users astray (unless you’re into that sort of thing). Create engaging routes, customize your markers with care, and always, always test your maps before unleashing them upon the world.
So go forth, my friends, and map your way to success! And remember, if you ever get lost along the way, just follow the breadcrumbs (or, you know, the support documentation).
Latest changelog
Changelog
Demo Content
Comments
Request update
About
- 1.0
- 2 seconds ago
- April 20, 2025
- Hicham Radi (CodeSpacing)™
- View all from author
- Navigation
- GPL v2 or later
- Support Link