Disclaimer
Description
Ever feel like tossing your digital wallet at the screen, begging your website to just work with your favorite payment gateway? Yeah, we’ve been there. That’s why we forked the buyCRED Stripe gateway module – because sometimes, you just need a tool that plays nice with your points-based system without making you want to pull your hair out. This isn’t your average, run-of-the-mill plugin. We’re talking about a solution meticulously crafted for those who demand seamless integration and zero drama.
We’re not reinventing the wheel, but we’re definitely giving it a sweet set of rims and low-profile tires. This enhanced module lets you effortlessly bridge the gap between your platform’s points economy and Stripe’s robust payment processing. Think of it as the ultimate translator, fluent in both ‘digital points’ and ‘real-world money.’ Get ready to unlock new revenue streams and keep your users happy (and spending!).
So, buckle up as we dive into the nitty-gritty of how this module can revolutionize the way you handle transactions, all while keeping your sanity intact. Ready to ditch the payment headaches and embrace a smoother, more profitable future?
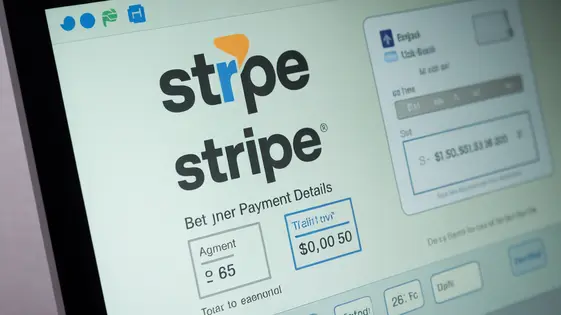
Setting Up Your Stripe Account for Points Redemption
To accept points as payment, you’ll need a merchant account. This chapter guides you through setting up your account and obtaining the necessary API keys. These keys are vital for connecting your platform’s points system with the payment gateway.
First, visit the merchant account website and create a new account. Follow their registration process, providing the required business information. Once your account is approved, navigate to the developer or API section of the dashboard. Here, you’ll find your API keys.
Locate your Publishable key. This key is used on the client-side to securely process payments. Copy it and store it temporarily. Next, find your Secret key. This key is crucial for server-side operations and should be treated with extreme care. Never expose your Secret key in client-side code or commit it to public repositories. Securely store it in your platform’s settings.
The Publishable key can usually be found under “API Keys” or “Developers”. The Secret key is often revealed only once and you may need to generate a new one if you lose it. Treat this key with extreme care!
Configuring the Stripe Payment Module in Platform
Once your Stripe account is set up, you can configure the payment module within the platform’s settings. First, enable the module to activate Stripe as a payment option for points redemption. A crucial setting is the Points Exchange Rate. This determines the monetary value of each point. For instance, setting it to 0.01 means 100 points equals $1.00. This rate directly affects the cost of purchasing points packages or redeeming points for products or services.
Next, you can customize the Payment Description that appears on users’ Stripe statements. Use a clear and concise description to avoid confusion, such as “Points Purchase” or “Product Redemption”. The platform also allows you to configure additional fees or taxes. This allows you to factor in processing fees or applicable sales taxes. Properly configuring these elements ensures correct point valuation, transparent transaction details for users, and accurate accounting for your business.
Testing Your Stripe Integration
Before processing live transactions, thorough testing is critical. Stripe provides a test mode for simulating payments. Access test mode via your Stripe dashboard. Obtain your test API keys (publishable and secret). Use these keys instead of your live keys in your platform’s payment settings.
Create test users within your platform to mimic different customer scenarios. Use Stripe’s test card numbers and other testing resources to simulate successful and failed payments. These resources are available in the Stripe documentation. Verify that your platform correctly processes successful payments. Confirm that points are awarded as expected within the myCRED system. Test scenarios like insufficient funds or incorrect card details. Ensure your platform handles these failures gracefully.
Inspect the payment confirmations and error messages. Verify that the exchange rate between points and currency is correctly applied. Check that any configured fees or taxes are accurately calculated. Always review Stripe’s logs for detailed information on each test transaction. Address any issues before switching to live mode. Neglecting testing can lead to lost revenue and a poor user experience.
Handling Refunds and Disputes
The module streamlines refund and dispute management. Refunds can be initiated directly from your platform’s admin panel. Locate the relevant transaction and select the refund option. You can issue full or partial refunds. Always consider communicating with the user before issuing a refund to understand the issue.
Disputes, also known as chargebacks, require careful attention. Stripe sends notifications directly to your platform when a dispute arises. Act swiftly upon receiving such notifications. The Stripe dashboard provides details about the dispute, including the reason and the amount contested.
Submitting compelling evidence is crucial for resolving disputes in your favor. Gather all relevant documentation: transaction records, communication logs with the user, and proof of service or product delivery. Present this evidence clearly and concisely to Stripe. Aim to respond to disputes promptly and professionally. Proactive customer service can prevent disputes. Address user concerns quickly and fairly. This helps maintain a positive reputation and minimizes financial losses associated with chargebacks. Keep detailed records of all transactions and communications.
Best Practices for Secure Stripe Payments
Securing Stripe payments is critical for protecting user data and maintaining trust. SSL encryption ensures data is encrypted between your platform and users, preventing eavesdropping. PCI compliance is essential for handling credit card information securely. Tokenization replaces sensitive card data with non-sensitive tokens. Use Stripe’s tokenization features to avoid storing raw card details on your servers, reducing your PCI compliance burden. Implement fraud prevention measures using Stripe Radar and monitor unusual activity. Keep your platform and Stripe integration up-to-date with security patches. Regularly review Stripe’s security documentation and stay informed about new features. Proactive security measures are vital.
Final words
So, there you have it. A comprehensive, albeit slightly sarcastic, guide to wielding the power of the buyCRED Stripe Payment Module. We’ve covered everything from setting up your Stripe account to handling those lovely disputes (because let’s face it, they happen). Remember, this module isn’t just about taking payments; it’s about creating a seamless, enjoyable experience for your users and, more importantly, making your life as a developer a whole lot easier.
By integrating Stripe with your platform’s points system, you’re not just opening up new revenue streams – you’re also giving your users a convenient way to engage with your content and services. It’s a win-win! And with the security measures and best practices we’ve discussed, you can rest assured that your transactions are safe and sound.
Now, go forth and conquer the world of digital payments! May your transactions be smooth, your users be happy, and your support tickets be few. And if you ever find yourself scratching your head, remember that the Festinger Vault community is always here to lend a helping hand. So, what are you waiting for? It’s time to unlock the full potential of your platform and watch those points turn into profits. Let’s get started!
Latest changelog
Changelog
Demo Content
Comments
Request update
About
- 2.2.7
- 3 seconds ago
- April 19, 2025
- myCred™
- View all from author
- Payment Gateway Add-on
- GPL v2 or later
- Support Link