Disclaimer
Description
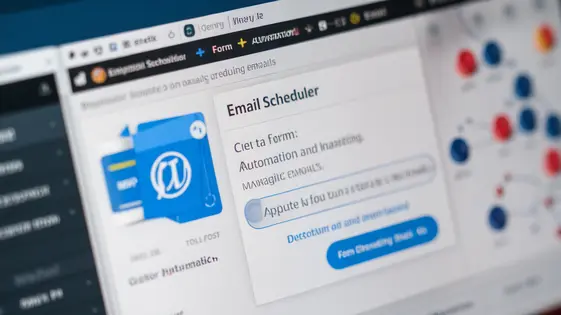
Ever wished you could seamlessly integrate your form submissions with your email marketing campaigns without wrestling with code or selling your soul to a complicated plugin? Let’s face it, nobody enjoys juggling multiple platforms and manually transferring data. It’s tedious, time-consuming, and frankly, a recipe for hair loss. That’s where FormBilder MailerLite Integration comes in – a nifty little tool designed to bridge the gap between your forms and your MailerLite account. This means automated subscriptions, targeted campaigns, and more time for the fun stuff, like perfecting your avocado toast recipe or finally learning to play the ukulele.
Think of it as the ultimate wingman for your email marketing efforts. It takes the data collected from your website forms and automatically adds it to your MailerLite subscriber lists. No more copy-pasting, no more CSV files, just pure, unadulterated automation. Whether you’re running a small blog, a bustling e-commerce store, or a global empire (congrats, by the way), this integration can save you hours of work and help you build a more engaged audience.
So, are you ready to ditch the manual labor and embrace the sweet, sweet freedom of automated email list management? Because we’re about to dive deep into how FormBilder MailerLite Integration can revolutionize your workflow and make your life a whole lot easier. Get ready to say goodbye to data entry drudgery and hello to streamlined email marketing bliss!
Getting Started: Setting Up the MailerLite Connection
To start using the email marketing service integration, you first need to establish a connection. This involves using an API key. This key grants the form builder permission to communicate with your email marketing service account.
Here’s how to connect using the API key:
- Locate your API Key: Log into your email marketing service account. Navigate to the “Integrations” or “API” section. You should find an API key listed. If one doesn’t exist, create a new one. Keep this key private.
- Access Integration Settings: In your form builder, find the email marketing service integration settings. This is usually in the form settings.
- Enter the API Key: Paste the API key from your email marketing service account into the designated field in the form builder settings.
- Save Settings: Save the integration settings in the form builder.
- Test the Connection: Most form builders have a “Test Connection” button. Use this to verify that the API key is valid and the connection is established.
Troubleshooting Connection Problems:
- Invalid API Key: Double-check that you copied the correct API key. Ensure there are no extra spaces.
- Permissions: Ensure the API key has the necessary permissions in your email marketing service account. Some services require specific permissions for integrations.
- Service Status: Check if your email marketing service is experiencing any outages or API issues.
With the connection established, you’re ready to begin mapping your form fields.
Mapping Form Fields: Ensuring Data Flows Smoothly
After successfully connecting to the email marketing service, you must map form fields. This ensures data from your form correctly populates fields in the service. Proper mapping is critical for segmentation and personalized campaigns. Begin by selecting the corresponding field in the email marketing service for each form field.
For common fields like name and email, the mapping is usually straightforward. Ensure the ‘email’ field is correctly mapped; otherwise, subscribers won’t be added. Phone number fields also require accurate mapping. When your form includes fields not found in the default service fields, you’ll need custom fields. Create these directly within the email marketing service platform. After creation, refresh the field list in the form integration settings. Then, map your form field to the newly created custom field.
A common issue is a mismatch in field types (e.g., mapping a text field to a number field). This can lead to data errors. Always verify that the field types are compatible. Another potential problem is forgetting to map a required field in the email marketing service. This will prevent successful submissions. Regularly test your form submissions to confirm that data flows correctly and all fields are mapped as expected. This proactive approach avoids issues and maintains data integrity.
Double Opt-In: Keeping Your List Clean and Compliant
Double opt-in is a crucial step. It ensures subscribers genuinely want to receive your communications. Enabling it within FormBilder’s integration is simple. Look for the double opt-in setting during setup. Activate it to add a confirmation step.
From the subscriber’s perspective, the process is straightforward. After submitting the form, they’ll receive a confirmation email. This email contains a link they must click to confirm their subscription. Only then are they added to your list.
Double opt-in offers significant benefits. It improves engagement by ensuring subscribers are genuinely interested. This leads to higher open rates and click-through rates. Deliverability also improves. Email providers see you’re only sending to verified subscribers.
One potential issue is a slightly lower initial subscription rate. Some people might not complete the confirmation step. To mitigate this, ensure your confirmation email is clear and compelling. Highlight the benefits of subscribing in the email. Also, check spam folders, sometimes confirmation emails can end up there. Regularly monitor your form submissions and address any issues promptly.
Conditional Logic: Tailoring Subscriptions Based on Form Data
Conditional logic lets you add subscribers to different groups. This depends on how they answer questions on your forms. Imagine a user filling out a form. They select their favorite product category. Based on that selection, they are added to the corresponding interest group. This keeps your communications targeted. It reduces the chance of sending irrelevant emails.
To achieve this, you’ll use the conditional options within the integration settings. Map specific form field responses to specific group subscriptions. For instance, if someone selects “Books” on the form, they are added to the “Book Lovers” group. If they select “Movies”, they are subscribed to the “Movie Fanatics” group. Plan out all the conditional subscription rules. Test them thoroughly to ensure the rules work. Make sure to handle cases where no condition matches. You can set a default group for unmatched responses. This prevents users from slipping through the cracks. Proper use of conditional logic enhances targeting. It also improves user experience.
Troubleshooting Common Issues: When Things Go Wrong (and How to Fix Them)
Even with careful setup, issues can arise with your form to subscription integration. A frequent problem is an API connection error. This usually occurs due to incorrect API keys or changes in MailerLite’s API. Double-check your API key in the integration settings. Ensure it has the necessary permissions. Another common issue involves field mapping discrepancies. If form fields aren’t correctly mapped to MailerLite fields, data won’t transfer properly. Verify that each form field corresponds to the correct field in your subscriber list. Subscription failures also happen, often because of invalid email addresses or pre-existing unsubscribed statuses. Implement email validation on your form. Review your double opt-in settings in MailerLite. If a user is already unsubscribed, they may need to manually resubscribe through MailerLite. Occasionally, the integration might stop functioning after a plugin update. Clear your website’s cache and check for plugin compatibility issues. If problems persist, review the error logs for specific messages. For advanced issues, consult the official documentation and support channels. Provide detailed information about your setup and the error messages you encounter.
Final words
FormBilder MailerLite Integration isn’t just another plugin; it’s your secret weapon for building a thriving email list without the headache of manual data entry. By seamlessly connecting your forms to MailerLite, you can automate the entire subscription process, ensuring that every new lead is captured and nurtured effectively. This not only saves you valuable time and resources but also allows you to focus on creating compelling content and engaging with your audience.
From setting up the initial connection to mapping fields and implementing conditional logic, this integration offers a range of features designed to streamline your email marketing efforts. And with double opt-in support, you can rest assured that your list is clean, compliant, and full of engaged subscribers who genuinely want to hear from you.
So, if you’re tired of juggling multiple platforms and spending hours on manual tasks, it’s time to embrace the power of automation. FormBilder MailerLite Integration empowers you to build a stronger, more engaged email list with ease. Say goodbye to data entry drudgery and hello to streamlined email marketing bliss! The final takeaway is simple: automate your workflows, grow your audience, and reclaim your time. Your marketing efforts (and your sanity) will thank you for it.
Latest changelog
Changelog
Demo Content
Comments
Request update
About
- 1.0.6
- 2 seconds ago
- April 20, 2025
- Crocoblock™
- View all from author
- Contact Form Add-on
- GPL v2 or later
- Support Link